A working automatic door operator is much more significant to everyday convenience than most people realize. It gives you easy access to your garage, enhances security, and is a convenience to your routine. However, with time, openers become either worn out, noisy, or cease to be efficient. Once that occurs, then the replacement of the system is the viable solution as opposed to carrying on with the repairs.
Learning how to change a garage door opener can help homeowners know the strategy, costs involved, and when professional service may be the more suitable choice. Whether your current unit is outdated or completely nonfunctional, upgrading to a current opener can improve safety, performance, and trustworthiness.
Symptoms That You Should Change Your Garage Door Opener
Before starting the relief process, it’s essential to ensure that a new opener is necessary. Several problems would indicate that your current system has come to the terminal stage.
Typical warning signs are :
- Too much noise in the operation
- Slow or uneven door movement
- Remote controls are working inconsistently
- Lack of modern safety features
- Frequent repair needs
How to select the Right automatic door operator
Not all openers are the same. Choosing the right type ensures smoother operation and long-term trustworthiness.
- Chain Drive Openers
These are durable and cost-effective, but can be noisy. They work well for detached garages.
- Belt Drive Openers
Belt-driven systems are also very quiet and therefore can be used in garages that are attached to houses.
- Screw Drive Openers
They use fewer moving components and do not need much maintenance, but may have poor performance in extreme temperatures.
- Smart Garage Openers
The contemporary units are connected to the mobile applications, enabling them to monitor and control remotely.
Tools Needed for Replacement
Changing an opener requires preparation and proper tools. Most installations involve:
- Power drill
- Adjustable wrench
- Ladder
- Screwdrivers
- Measuring tape
- Safety gloves and glasses
Always disconnect power before beginning work to avoid electrical shorts.
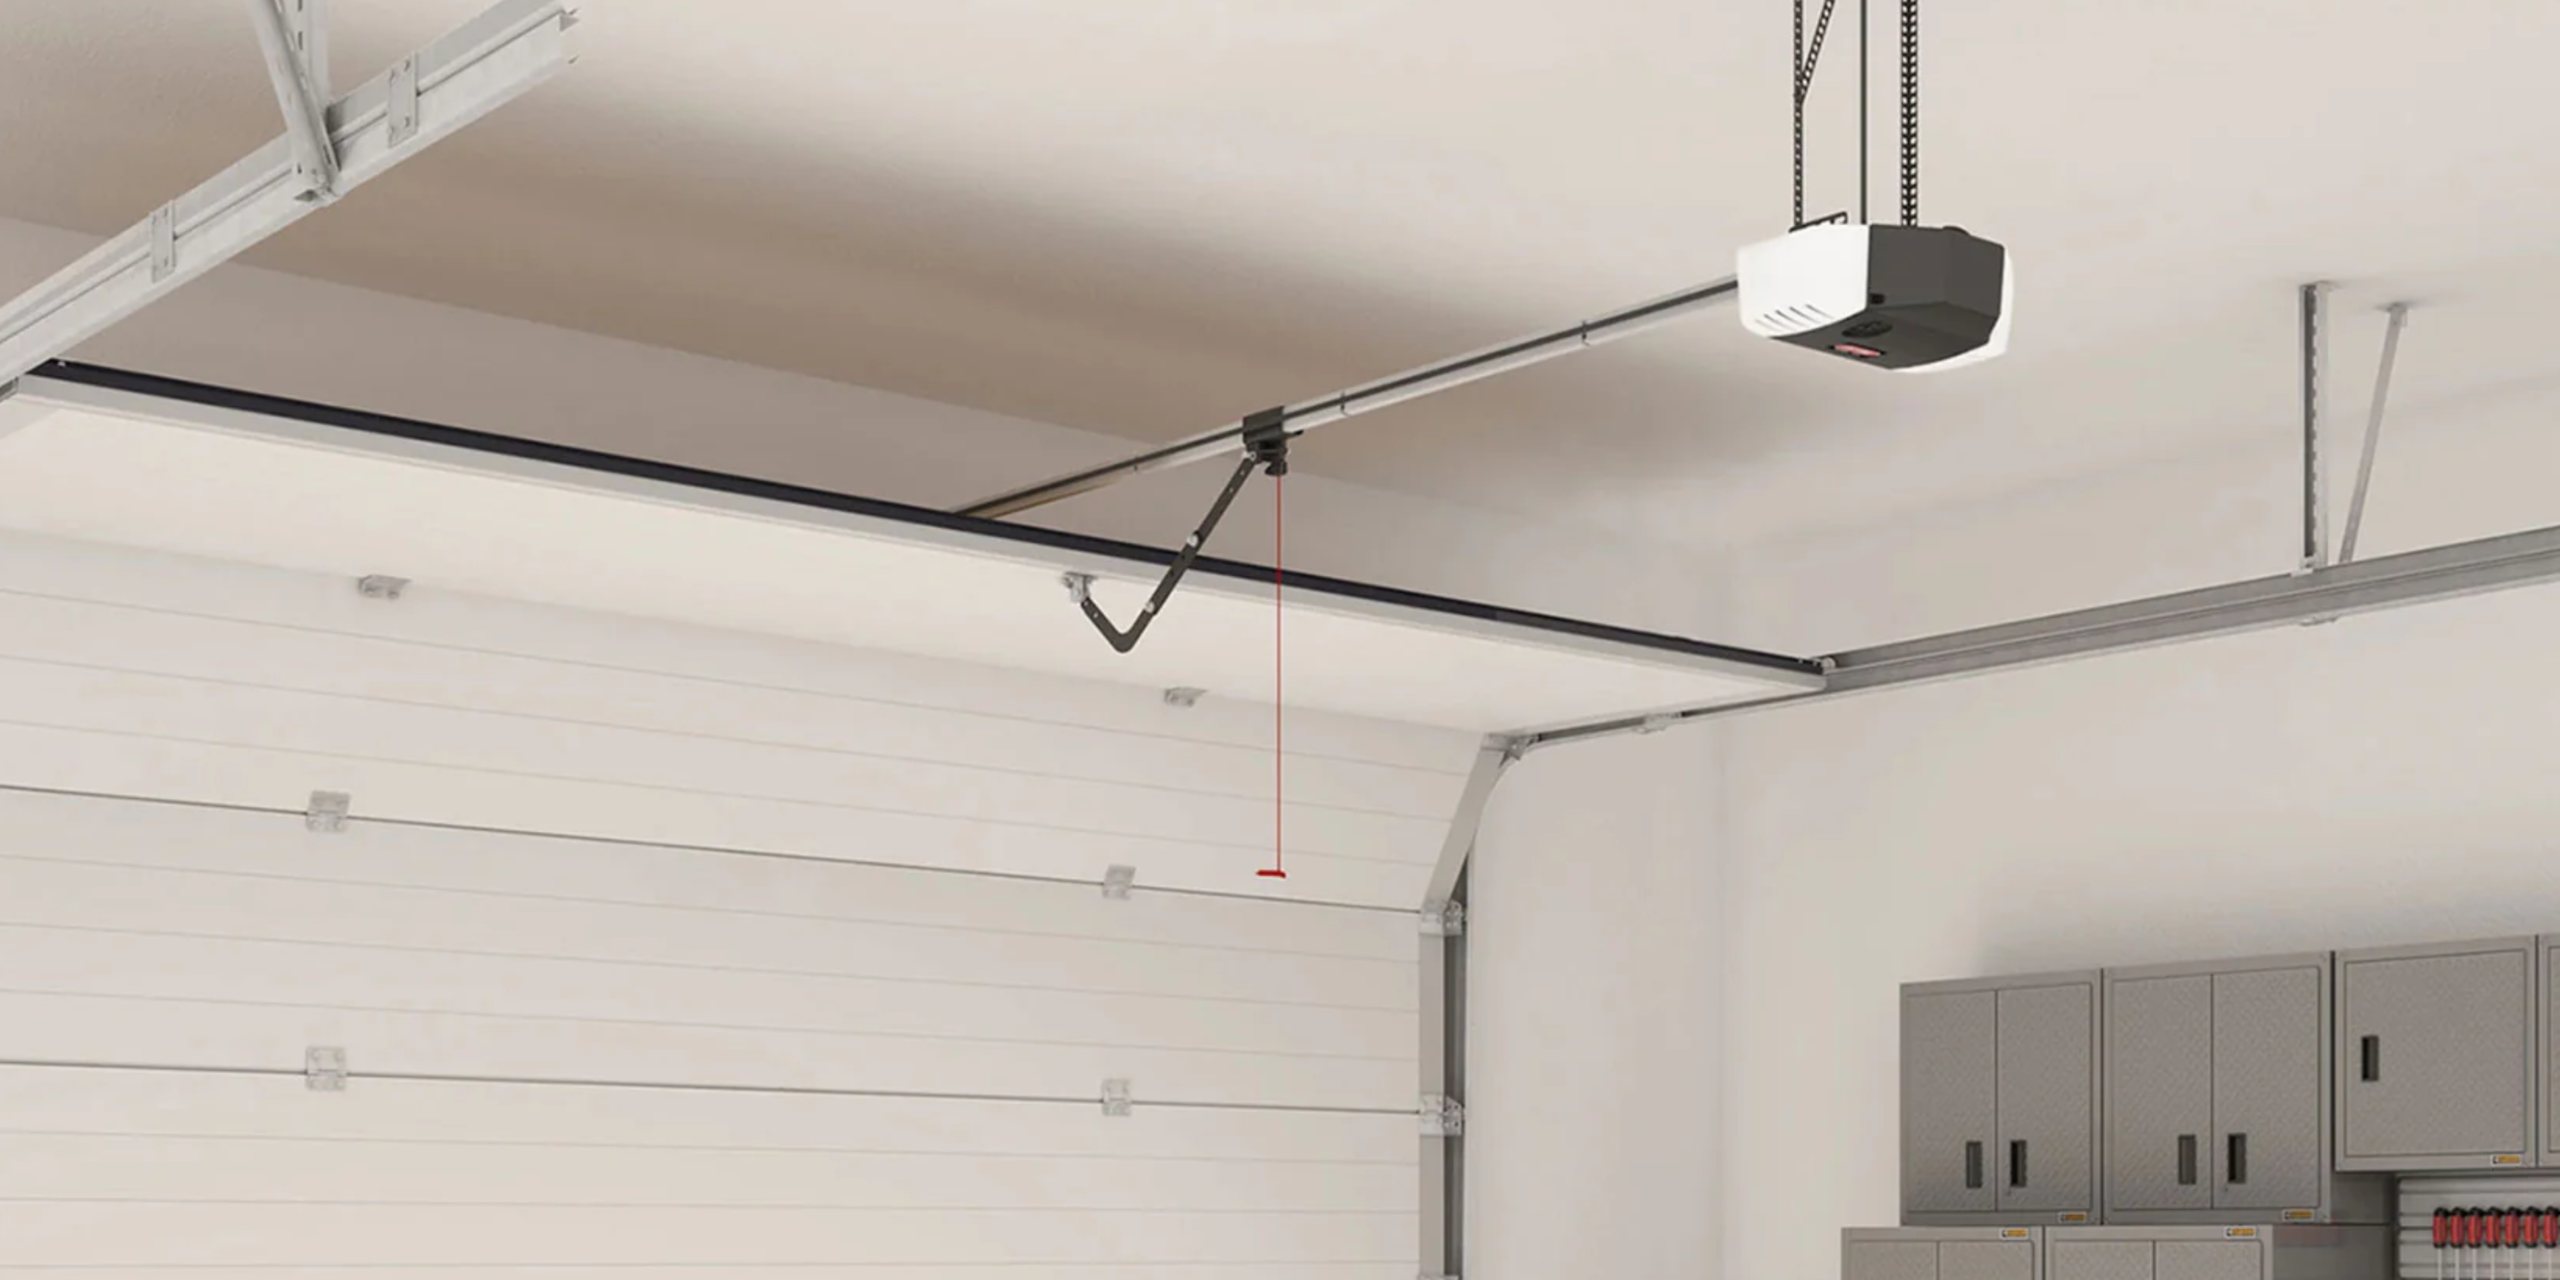
Instructions: How to replace an automatic door operator
Below is a simplified overview to help you understand how to set up garage door opener systems during replacement.
Step 1: Unplug the Connection of the Old Opener
Turn off the unit and undo the emergency release cord. Installation: Take down mounting brackets and dismount the opener from the ceiling support.
Step 2: Decommission Existing Hardware
Unfit string rails, chain, or belt are attached to the old system precisely. Store screws ordered in case they’re demanded again.
Step 3: Assemble the New Opener
Assemble the rail system and motor unit according to the instructions of the manufacturer, and then mount.
Step 4 Mount the Mounting Bracket
Attach the head bracket to the garage door, and cement supports to the ceiling.
Step 5: Mount the Motor Unit
Hold the opener and fasten it to the ceiling brackets. Keep it level so that it does not cause operational problems.
Step 6: Connect the Door Arm
Install the opener arm on the garage door and use it manually before switching on.
Step 7: Wiring and Programming
Install remote systems, safety sensors, and wall controls. Change travel controls and force controls as in the instructions.
Safety Advice for Installation
Safety should always come first because garage doors are heavy and work under pressure.
When lifting equipment, never operate alone.
- Ensure safety sensors align properly.
- Avoid overtightening mounting hardware.
- Test auto-reverse functionality after installation.
Many people rely on professionals because improper installation can harm the door or pose safety risks.
Why It Can Be Worth Professional Installation.
Although there are homeowners who will undertake the task of DIY replacement, expert installation guarantees proper installation and durability.
Door Dorks know the garage systems well and therefore can detect concealed problems such as faulty springs or misalignment of the tracks during the installation. It will also save time and minimize the possibility of making expensive errors due to professional service.
Moreover, we make sure that the standards of safety are achieved and that your new opener works on the first day of your ownership.
After-Installation Maintenance Advice
Regular maintenance will help extend the life of your newly installed automatic door operator.
- Oil moving components after every few months
- Check sensor alignment regularly
- Tighten loose bolts and brackets
- Replace remote batteries annually
- Schedule periodic professional examinations
Conclusion
A good way of enhancing convenience, safety, and day- to- day functionality in your house is by replacing agarage door opener. The knowledge of the process also allows homeowners to make wise opinions, either on a do- it- yourself basis or through outdoor construction.
A correctly fitted opener promises a smooth operation, silence in operation, and accessibility of the opener in the coming years. The specialists Door Dorks can offer the expertise and advice that homeowners seek when it comes to having a reliable installation and professional advice on how to install every system most effectively and safely.
FAQs:-
1. What is the time taken to change an automatic door operator?
The average replacement time is between two and four hours based on experience and the arrangement of the garage.
2. Is it possible to install a replacement automatic door operator?
Yes, but it needs equipment, power, and caution. The process of professional installation is usually safer and quicker.
3. What is the best type of opener?
Take into consideration the noise level, the location of a garage, and the way it is used every day. Belt drive systems are normally the ones that are preferred to run quieter.
4. Are new automatic door operators secure?
Yes, contemporary openers have rolling-code technology and intelligent controls that boost the security in homes.
5. What is the frequency of changing a garage door opener?
The lifespan of most openers is 10 -15 years under normal maintenance, after which replacement is required.

